VPSでAlmaLinux (16) phpMyAdminの導入

前回は、MariaDBの構築を行った。
今回は、phpMyAdminの導入を行う。

EPELのインストール

まずは、Extra Packages for Enterprise Linux (EPEL)をインストール。
ACMEクライアントをインストールする際にインストールしているため不要だが、まだの場合は次のコマンドでインストール。

続きを読む VPSでAlmaLinux (16) phpMyAdminの導入

VPSでAlmaLinux (15) MariaDBの構築

前回は、WebサーバのSSL化を行った。
今回は、MariaDBの構築を行う。

インストール

MariaDBは、MySQL後継のデータベースサーバー。

まず、MariaDBの公式サイト(https://mariadb.org/)へ行き、「Download」を選択。
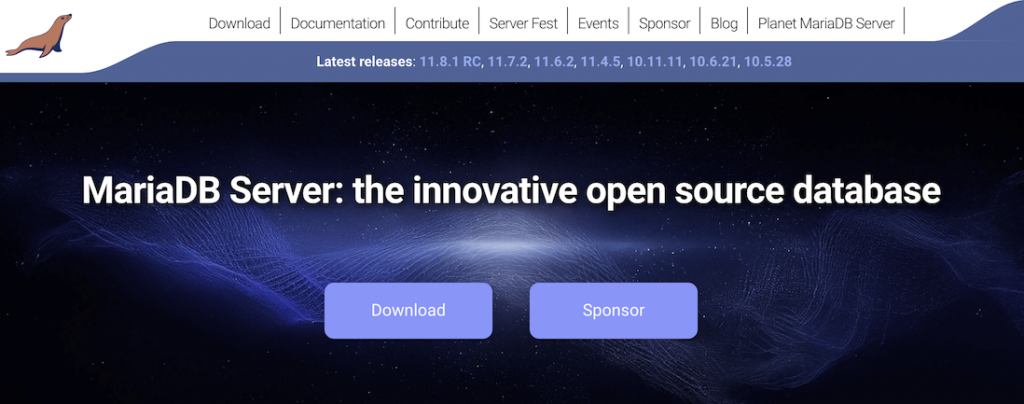
「the latest long-term release is MariaDB 11.4, which is maintained for five years.」

現時点での長期保守バージョンは、11.4とのことなので、「MariaDB Server Repositories」タブで、次を選択。

  • Choose a distribution「Red Hat Enterprise Linux 9」
  • Choose a MariaDB Server vertson「11.4」
  • Mirror(適当)

まずは、レポジトリの設定ファイルを追加する。

$ sudo vi /etc/yum.repos.d/MariaDB.repo

中身は、サイトに表示されたものをコピペすれば良い。

# MariaDB 11.4 RedHatEnterpriseLinux repository list - created 2025-03-23 07:28 UTC
# https://mariadb.org/download/
[mariadb]
name = MariaDB
# rpm.mariadb.org is a dynamic mirror if your preferred mirror goes offline. See https://mariadb.org/mirrorbits/ for details.
# baseurl = https://rpm.mariadb.org/11.4/rhel/$releasever/$basearch
baseurl = https://ftp.yz.yamagata-u.ac.jp/pub/dbms/mariadb/yum/11.4/rhel/$releasever/$basearch
# gpgkey = https://rpm.mariadb.org/RPM-GPG-KEY-MariaDB
gpgkey = https://ftp.yz.yamagata-u.ac.jp/pub/dbms/mariadb/yum/RPM-GPG-KEY-MariaDB
gpgcheck = 1

そして、またサイトに記載されているコマンドを実行し、インストール。

$ sudo dnf -y install MariaDB-server
 :
Installed:
MariaDB-client-11.4.5-1.el9.x86_64 MariaDB-common-11.4.5-1.el9.x86_64 MariaDB-server-11.4.5-1.el9.x86_64
MariaDB-shared-11.4.5-1.el9.x86_64 boost-program-options-1.75.0-8.el9.x86_64 galera-4-26.4.21-1.el9.x86_64
lsof-4.94.0-3.el9.x86_64 perl-AutoLoader-5.74-481.el9.noarch perl-B-1.80-481.el9.x86_64
perl-Carp-1.50-460.el9.noarch perl-Class-Struct-0.66-481.el9.noarch perl-DBI-1.643-9.el9.x86_64
perl-Data-Dumper-2.174-462.el9.x86_64 perl-Digest-1.19-4.el9.noarch perl-Digest-MD5-2.58-4.el9.x86_64
perl-DynaLoader-1.47-481.el9.x86_64 perl-Encode-4:3.08-462.el9.x86_64 perl-Errno-1.30-481.el9.x86_64
perl-Exporter-5.74-461.el9.noarch perl-Fcntl-1.13-481.el9.x86_64 perl-File-Basename-2.85-481.el9.noarch
perl-File-Copy-2.34-481.el9.noarch perl-File-Path-2.18-4.el9.noarch perl-File-Temp-1:0.231.100-4.el9.noarch
perl-File-stat-1.09-481.el9.noarch perl-FileHandle-2.03-481.el9.noarch perl-Getopt-Long-1:2.52-4.el9.noarch
perl-Getopt-Std-1.12-481.el9.noarch perl-HTTP-Tiny-0.076-462.el9.noarch perl-IO-1.43-481.el9.x86_64
perl-IO-Socket-IP-0.41-5.el9.noarch perl-IO-Socket-SSL-2.073-2.el9.noarch perl-IPC-Open3-1.21-481.el9.noarch
perl-MIME-Base64-3.16-4.el9.x86_64 perl-Math-BigInt-1:1.9998.18-460.el9.noarch perl-Math-Complex-1.59-481.el9.noarch
perl-Mozilla-CA-20200520-6.el9.noarch perl-NDBM_File-1.15-481.el9.x86_64 perl-Net-SSLeay-1.94-1.el9.x86_64
perl-POSIX-1.94-481.el9.x86_64 perl-PathTools-3.78-461.el9.x86_64 perl-Pod-Escapes-1:1.07-460.el9.noarch
perl-Pod-Perldoc-3.28.01-461.el9.noarch perl-Pod-Simple-1:3.42-4.el9.noarch perl-Pod-Usage-4:2.01-4.el9.noarch
perl-Scalar-List-Utils-4:1.56-462.el9.x86_64 perl-SelectSaver-1.02-481.el9.noarch perl-Socket-4:2.031-4.el9.x86_64
perl-Storable-1:3.21-460.el9.x86_64 perl-Symbol-1.08-481.el9.noarch perl-Sys-Hostname-1.23-481.el9.x86_64
perl-Term-ANSIColor-5.01-461.el9.noarch perl-Term-Cap-1.17-460.el9.noarch perl-Text-ParseWords-3.30-460.el9.noarch
perl-Text-Tabs+Wrap-2013.0523-460.el9.noarch perl-Time-Local-2:1.300-7.el9.noarch perl-URI-5.09-3.el9.noarch
perl-base-2.27-481.el9.noarch perl-constant-1.33-461.el9.noarch perl-if-0.60.800-481.el9.noarch
perl-interpreter-4:5.32.1-481.el9.x86_64 perl-libnet-3.13-4.el9.noarch perl-libs-4:5.32.1-481.el9.x86_64
perl-mro-1.23-481.el9.x86_64 perl-overload-1.31-481.el9.noarch perl-overloading-0.02-481.el9.noarch
perl-parent-1:0.238-460.el9.noarch perl-podlators-1:4.14-460.el9.noarch perl-subs-1.03-481.el9.noarch
perl-vars-1.05-481.el9.noarch pv-1.6.20-1.el9.x86_64 socat-1.7.4.1-6.el9.x86_64

Complete!

サーバーのサービスを自動起動に設定し、同時に起動。

$ sudo systemctl enable --now mariadb.service
Created symlink /etc/systemd/system/multi-user.target.wants/mariadb.service → /usr/lib/systemd/system/mariadb.service.

確認と設定

バージョンの確認。

$ mariadb --version
mariadb from 11.4.5-MariaDB, client 15.2 for Linux (x86_64) using EditLine wrapper

セキュリティスクリプトの実行

セキュリティを高めるためのスクリプトを実行。

$ sudo /usr/bin/mariadb-secure-installation

NOTE: RUNNING ALL PARTS OF THIS SCRIPT IS RECOMMENDED FOR ALL MariaDB
SERVERS IN PRODUCTION USE! PLEASE READ EACH STEP CAREFULLY!

In order to log into MariaDB to secure it, we'll need the current
password for the root user. If you've just installed MariaDB, and
haven't set the root password yet, you should just press enter here.

Enter current password for root (enter for none):
OK, successfully used password, moving on...

Setting the root password or using the unix_socket ensures that nobody
can log into the MariaDB root user without the proper authorisation.

You already have your root account protected, so you can safely answer 'n'.

Switch to unix_socket authentication [Y/n]
Enabled successfully!
Reloading privilege tables..
... Success!


You already have your root account protected, so you can safely answer 'n'.

Change the root password? [Y/n] n
... skipping.

By default, a MariaDB installation has an anonymous user, allowing anyone
to log into MariaDB without having to have a user account created for
them. This is intended only for testing, and to make the installation
go a bit smoother. You should remove them before moving into a
production environment.

Remove anonymous users? [Y/n]
... Success!

Normally, root should only be allowed to connect from 'localhost'. This
ensures that someone cannot guess at the root password from the network.

Disallow root login remotely? [Y/n]
... Success!

By default, MariaDB comes with a database named 'test' that anyone can
access. This is also intended only for testing, and should be removed
before moving into a production environment.

Remove test database and access to it? [Y/n]
- Dropping test database...
... Success!
- Removing privileges on test database...
... Success!

Reloading the privilege tables will ensure that all changes made so far
will take effect immediately.

Reload privilege tables now? [Y/n]
... Success!

Cleaning up...

All done! If you've completed all of the above steps, your MariaDB
installation should now be secure.

Thanks for using MariaDB!

以上で、セキュアになった。

rootでmariadbを実行して、ユーザー権限の確認を行う。

$ sudo mariadb
Welcome to the MariaDB monitor. Commands end with ; or \g.
Your MariaDB connection id is 12
Server version: 11.4.5-MariaDB MariaDB Server

Copyright (c) 2000, 2018, Oracle, MariaDB Corporation Ab and others.

Type 'help;' or '\h' for help. Type '\c' to clear the current input statement.

MariaDB [(none)]> show grants for root@localhost;
+-----------------------------------------------------------------------------------------------------------------------------------------+
| Grants for root@localhost |
+-----------------------------------------------------------------------------------------------------------------------------------------+
| GRANT ALL PRIVILEGES ON *.* TO `root`@`localhost` IDENTIFIED VIA mysql_native_password USING 'invalid' OR unix_socket WITH GRANT OPTION |
| GRANT PROXY ON ''@'%' TO 'root'@'localhost' WITH GRANT OPTION |
+-----------------------------------------------------------------------------------------------------------------------------------------+
2 rows in set (0.001 sec)

「’invalid’ OR unix_socket」とのことで、UNIXユーザー認証のみで接続可能。

他の一般ユーザーでログインしたい場合は、次のSQLでユーザーを追加して反映させる。

MariaDB [(none)]> CREATE USER "nori"@"localhost";
Query OK, 0 rows affected (0.012 sec)

MariaDB [(none)]> flush privileges;
Query OK, 0 rows affected (0.001 sec)

パスワード認証ではなく、UNIXユーザーでの認証のため、同じユーザー名であればDBに接続可能。

現時点でのユーザー情報を知りたい場合は、次のSQLで確認。

MariaDB [(none)]> select * FROM mysql.global_priv;
+-----------+-------------+------------------------------------------------------------------------------------------------------------------------------------------------------------------------------------------+
| Host | User | Priv |
+-----------+-------------+------------------------------------------------------------------------------------------------------------------------------------------------------------------------------------------+
| localhost | mariadb.sys | {"access":0,"plugin":"mysql_native_password","authentication_string":"","account_locked":true,"password_last_changed":0} |
| localhost | root | {"access": 10000000000000000000, "plugin": "mysql_native_password", "authentication_string": "invalid", "auth_or": [{}, {"plugin": "unix_socket"}], "password_last_changed": 1111111111} |
| localhost | mysql | {"access":10000000000000000000,"plugin":"mysql_native_password","authentication_string":"invalid","auth_or":[{},{"plugin":"unix_socket"}]} |
| | PUBLIC | {"access":0,"is_role":true} |
| localhost | nori | {"access":0,"version_id":110405,"plugin":"mysql_native_password","authentication_string":"*XXXXXXXXXXXXXXXXXXXXXXXXXXXXXXXXXXXXXXXX","password_last_changed":1111111111} |
+-----------+-------------+------------------------------------------------------------------------------------------------------------------------------------------------------------------------------------------+
5 rows in set (0.001 sec)

文字コードの変更

次に、文字コードを4バイトのUTF-8、つまりutf8mb4に変更したい。

ヘルプによると、「utf8(utf8mb3) という名前の文字セットは、文字あたり最大 3 バイトを使用し、BMP 文字だけを含みます。utf8mb4 文字セットは、文字ごとに最大 4 バイトを使用し、補助文字をサポートします。」とのことで、補助文字を使えるようにするには、utf8mb4にする必要があると。

まず、現状の文字コードを参照。

$ sudo mariadb
Welcome to the MariaDB monitor. Commands end with ; or \g.
Your MariaDB connection id is 12
Server version: 11.4.5-MariaDB MariaDB Server

Copyright (c) 2000, 2018, Oracle, MariaDB Corporation Ab and others.

Type 'help;' or '\h' for help. Type '\c' to clear the current input statement.

MariaDB [(none)]> show variables like "character%";
+--------------------------+------------------------------+
| Variable_name | Value |
+--------------------------+------------------------------+
| character_set_client | utf8mb3 |
| character_set_collations | |
| character_set_connection | utf8mb3 |
| character_set_database | latin1 |
| character_set_filesystem | binary |
| character_set_results | utf8mb3 |
| character_set_server | latin1 |
| character_set_system | utf8mb3 |
| character_sets_dir | /usr/share/mariadb/charsets/ |
+--------------------------+------------------------------+
9 rows in set (0.001 sec)

MariaDB [(none)]> show variables like "collation%";
+----------------------+--------------------+
| Variable_name | Value |
+----------------------+--------------------+
| collation_connection | utf8mb3_general_ci |
| collation_database | latin1_swedish_ci |
| collation_server | latin1_swedish_ci |
+----------------------+--------------------+
3 rows in set (0.001 sec)

MariaDB [(none)]> quit
Bye

サーバーの設定ファイルを変更。

$ sudo vi /etc/my.cnf.d/server.cnf
# This group is read by both MariaDB and MySQL servers
[mysqld]
character-set-server=utf8mb4 ←追加
collation-server=utf8mb4_general_ci ←追加

クライアント側の設定も変更。

$ sudo vi /etc/my.cnf.d/mysql-clients.cnf
[mysql]
default-character-set=utf8mb4 ←追加

[mysqldump]
default-character-set=utf8mb4 ←追加

MariaDBを再起動。

$ sudo systemctl restart mariadb

エラーログの出力

変更後の文字コードを確認。

$ sudo mariadb
Welcome to the MariaDB monitor. Commands end with ; or \g.
Your MariaDB connection id is 3
Server version: 11.4.5-MariaDB MariaDB Server

Copyright (c) 2000, 2018, Oracle, MariaDB Corporation Ab and others.

Type 'help;' or '\h' for help. Type '\c' to clear the current input statement.

MariaDB [(none)]> show variables like "character%";
+--------------------------+------------------------------+
| Variable_name | Value |
+--------------------------+------------------------------+
| character_set_client | utf8mb4 |
| character_set_collations | |
| character_set_connection | utf8mb4 |
| character_set_database | utf8mb4 |
| character_set_filesystem | binary |
| character_set_results | utf8mb4 |
| character_set_server | utf8mb4 |
| character_set_system | utf8mb3 |
| character_sets_dir | /usr/share/mariadb/charsets/ |
+--------------------------+------------------------------+
9 rows in set (0.001 sec)

MariaDB [(none)]> show variables like "collation%";
+----------------------+--------------------+
| Variable_name | Value |
+----------------------+--------------------+
| collation_connection | utf8mb4_general_ci |
| collation_database | utf8mb4_general_ci |
| collation_server | utf8mb4_general_ci |
+----------------------+--------------------+
3 rows in set (0.001 sec)

MariaDB [(none)]> quit
Bye

デフォルトではログが出力されない。エラーログだけ出しておくために、設定ファイルに設定を追加。

$ sudo vi /etc/my.cnf.d/server.cnf
[mysqld]
log_error=/var/log/mysql/error.log
log_output = FILE
log_warnings = 1
long_query_time = 3
slow_query_log = 1
slow_query_log_file = /var/log/mysql/slow.log

MariaDBを再起動。

$ sudo systemctl restart mariadb

以上で初期設定は完了!

次回は、phpMyAdminを導入する。

お友達紹介プログラムを利用して契約すると10%OFFになるそうなので、
もしよろしければ次の画像をクリックしてみてください。

投稿一覧はこちら→「VPSでAlmaLinux

VPSでAlmaLinux (13) ACMEクライアントをインストール

前回は、Webサーバのディレクトリ構成変更を行った。
今回は、ACMEクライアントのインストールを行う。

インストール方法

ACMEとは、Automated Certificate Management Environmentの略で、そのクライアントcertbotをインストールする。HTTPSに対応すべく、Let’s Encryptにて証明書を取得するため。

まずは、certbotのサイトへ行く。

続きを読む VPSでAlmaLinux (13) ACMEクライアントをインストール

VPSでAlmaLinux (12) Webサーバのディレクトリ構成変更

前回は、Webサーバーの構築を行った。
今回は、Webサーバのディレクトリ構成変更を行う。

ユーザーとグループの変更

ApacheとNginxで、利用するユーザーが異なるのは、今までの資産を使う上でややこしいので、wwwというユーザーとグループを利用することにする。

続きを読む VPSでAlmaLinux (12) Webサーバのディレクトリ構成変更