前回は、MariaDBの構築を行った。
今回は、phpMyAdminの導入を行う。
EPELのインストール
まずは、Extra Packages for Enterprise Linux (EPEL)をインストール。
ACMEクライアントをインストールする際にインストールしているため不要だが、まだの場合は次のコマンドでインストール。
$ sudo dnf -y install epel-release
 :
Installed:
  epel-release-9-9.el9.noarch

Complete!
$ sudo dnf -y upgrade
phpMyAdminのインストール
次にphpMyAdminをインストール。
$ sudo dnf -y install phpMyAdmin
 :
Installed:
  fontconfig-2.14.0-2.el9_1.x86_64      gd-2.3.2-3.el9.x86_64                httpd-filesystem-2.4.62-1.el9_5.2.noarch     jbigkit-libs-2.1-23.el9.x86_64
  libX11-1.7.0-9.el9.x86_64             libX11-common-1.7.0-9.el9.noarch     libXau-1.0.9-8.el9.x86_64                    libXpm-3.5.13-10.el9.x86_64
  libjpeg-turbo-2.0.90-7.el9.x86_64     libtiff-4.4.0-13.el9.x86_64          libwebp-1.2.0-8.el9_3.x86_64                 libxcb-1.13.1-9.el9.x86_64
  libxslt-1.1.34-9.el9.x86_64           libzip-1.7.3-8.el9.x86_64            php-common-8.0.30-1.el9_2.x86_64             php-fpm-8.0.30-1.el9_2.x86_64
  php-gd-8.0.30-1.el9_2.x86_64          php-intl-8.0.30-1.el9_2.x86_64       php-mbstring-8.0.30-1.el9_2.x86_64           php-mysqlnd-8.0.30-1.el9_2.x86_64
  php-pdo-8.0.30-1.el9_2.x86_64         php-pecl-zip-1.19.2-6.el9.x86_64     php-process-8.0.30-1.el9_2.x86_64            php-xml-8.0.30-1.el9_2.x86_64
  phpMyAdmin-5.2.2-1.el9.noarch         xml-common-0.6.3-58.el9.noarch

Complete!
設定ファイルは、次の場所。
- /etc/phpMyAdmin/config.inc.php
phpMyAdminの設定 - /etc/nginx/default.d/phpMyAdmin.conf
phpMyAdminを表示するためのWebサーバの設定
Webサーバーの設定が変更されているため、Webサーバーを再起動。
$ sudo systemctl restart nginx
この時点で、次のURLでphpMyAdminが表示される。
https://your.domain/phpMyAdmin/
URLの変更
ただ、セキュリティ上URLを変えた方が良いので、設定ファイルを変更する。
$ sudo vi /etc/nginx/default.d/phpMyAdmin.conf
元の設定ファイルは、次のとおり。
# phpMyAdmin

location = /phpMyAdmin {
    alias /usr/share/phpMyAdmin/;
}

location /phpMyAdmin/ {
     root /usr/share;
     index index.php index.html;

     location ~ ^/phpMyAdmin/(.+\.php)$
     {
         try_files $uri =404;
         fastcgi_intercept_errors on;
         include        fastcgi_params;
         fastcgi_param  SCRIPT_FILENAME  $document_root$fastcgi_script_name;
         fastcgi_pass   php-fpm;
     }
}
次のように変更。
# phpMyAdmin

location = /tekitou {
    alias /usr/share/phpMyAdmin/;
}

location /tekitou/ {
     alias /usr/share/phpMyAdmin/;
     index index.php index.html;

     location ~ ^/tekitou/(.+\.php)$
     {
         try_files $uri =404;
         fastcgi_intercept_errors on;
         include        fastcgi_params;
         fastcgi_param  SCRIPT_FILENAME  $request_filename;
         fastcgi_pass   php-fpm;
     }
}
サーバーの設定を読み込み直す。
$ sudo systemctl reload nginx
次のURLでphpMyAdminが表示される。
https://your.domain/tekitou/
ユーザー追加
インストールはできたが、パスワード認証可能なユーザーがないため、ログインができない。
phpMyAdminからログイン可能なユーザーを、CUIで作成する。
$ sudo mariadb
Welcome to the MariaDB monitor.  Commands end with ; or \g.
Your MariaDB connection id is 7
Server version: 11.4.5-MariaDB-log MariaDB Server

Copyright (c) 2000, 2018, Oracle, MariaDB Corporation Ab and others.

Type 'help;' or '\h' for help. Type '\c' to clear the current input statement.

MariaDB [(none)]> CREATE USER pma_admin@localhost IDENTIFIED BY 'admin_password';
Query OK, 0 rows affected (0.012 sec)

MariaDB [(none)]> flush privileges;
Query OK, 0 rows affected (0.001 sec)

MariaDB [(none)]> SELECT * FROM mysql.global_priv WHERE user = 'pma_admin';
+-----------+-----------+--------------------------------------------------------------------------------------------------------------------------------------------------------------------------+
| Host      | User      | Priv                                                                                                                                                                     |
+-----------+-----------+--------------------------------------------------------------------------------------------------------------------------------------------------------------------------+
| localhost | pma_admin | {"access":0,"version_id":100000,"plugin":"mysql_native_password","authentication_string":"*","password_last_changed":1000000000} |
+-----------+-----------+--------------------------------------------------------------------------------------------------------------------------------------------------------------------------+
1 row in set (0.002 sec)
ログインは可能。


だだ、ログインはできるが、権限が何もない。
一時的に権限をフルに付ける。
MariaDB [(none)]> GRANT ALL PRIVILEGES ON *.* TO pma_admin@localhost;
Query OK, 0 rows affected (0.002 sec)

MariaDB [(none)]> SELECT * FROM mysql.global_priv WHERE user='pma_admin';
+-----------+-----------+--------------------------------------------------------------------------------------------------------------------------------------------------------------------------------------+
| Host      | User      | Priv                                                                                                                                                                                 |
+-----------+-----------+--------------------------------------------------------------------------------------------------------------------------------------------------------------------------------------+
| localhost | pma_admin | {"access":1000000000000,"version_id":100000,"plugin":"mysql_native_password","authentication_string":"*","password_last_changed":1000000000} |
+-----------+-----------+--------------------------------------------------------------------------------------------------------------------------------------------------------------------------------------+
1 row in set (0.001 sec)
表示されるデータベースも増えた。
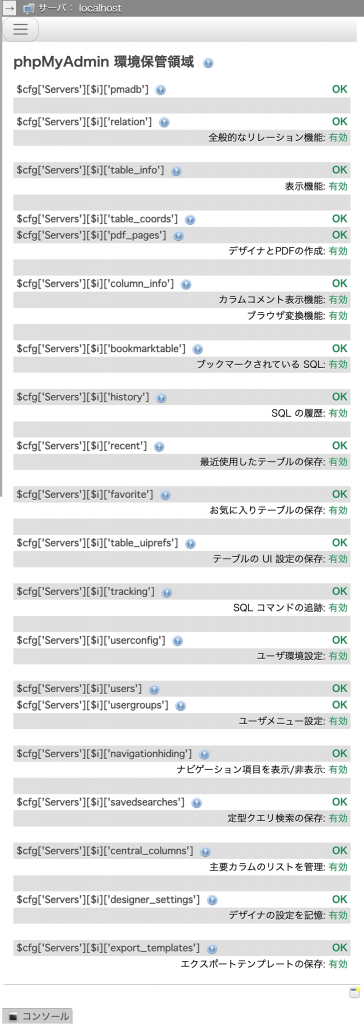
右の最下に「phpMyAdmin 環境保管領域が完全に設定されていないため、、、」という表示が出ているので、「こちら」を選択。

「データベースを作成」部分を選択して、データベースを準備する。

ずらずらと処理結果が表示されて、やっと完了。

次回は、WordPressを導入する。
お友達紹介プログラムを利用して契約すると10%OFFになるそうなので、
もしよろしければ次の画像をクリックしてみてください。

投稿一覧はこちら→「VPSでAlmaLinux」
