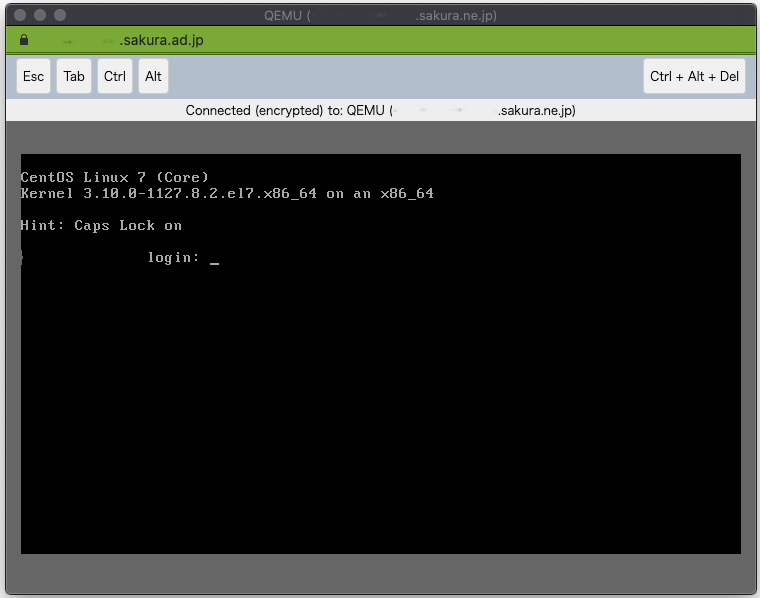
前回で、CentOSのインストール画面までは表示できたので、今回は実際にインストールを行っていく。
(さらに…)カテゴリー: PC
-
マインクラフトのサーバを作ってみる(1)
マインクラフト(Minecraft)のサーバを構築したことがある。
CentOS上でJAVA版のサーバを作った。
そして遊んだ。最近の世の中の状況によって、外に出れないので、再び遊ぼうと思ったが、統合版からはログインできない。
ということで、統合版から遊べるサーバを構築してみる。
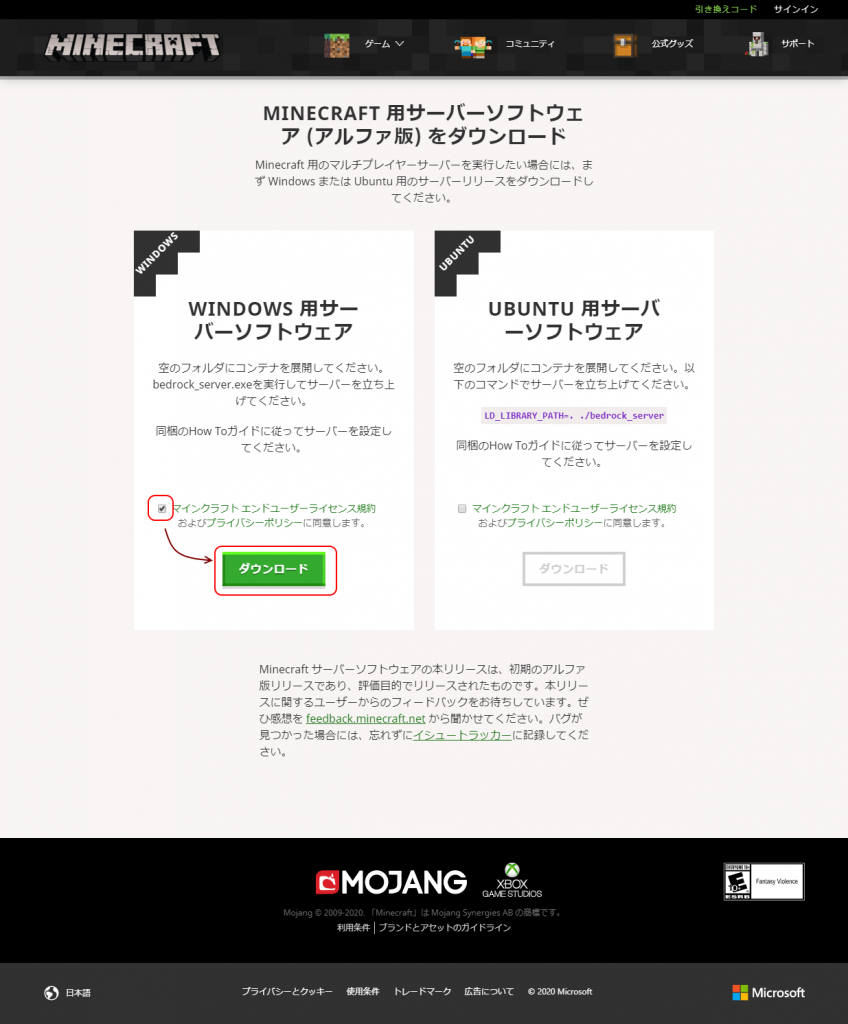
ダウンロード
なんだかんだに同意してから、ダウンロードボタンを押して、ZIPファイルをダウンロード。
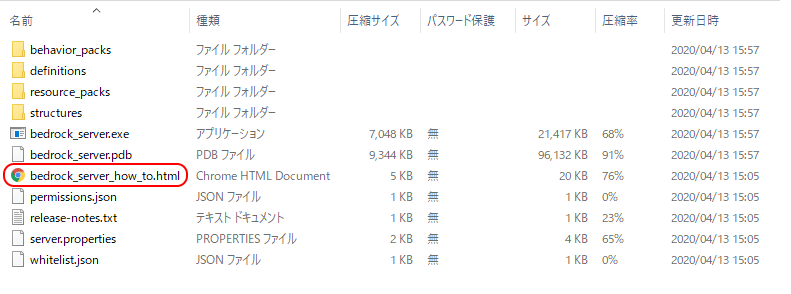
bedrock_server_how_to.html ダウンロードしたファイルをすべて展開したら、フォルダ内のbedrock_server_how_to.htmlを開いて確認。

bedrock_server_how_to.html LANでつながった他の端末からもサーバーに接続したいときは、次のコマンドをコマンドラインから実行しておく。
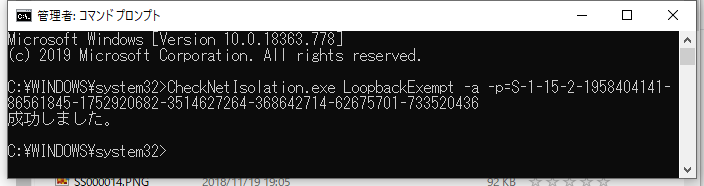
CheckNetIsolation.exe LoopbackExempt –a –p=S-1-15-2-1958404141-86561845-1752920682-3514627264-368642714-62675701-733520436 単純に、 bedrock_server.exe を実行すればサーバーは起動する。
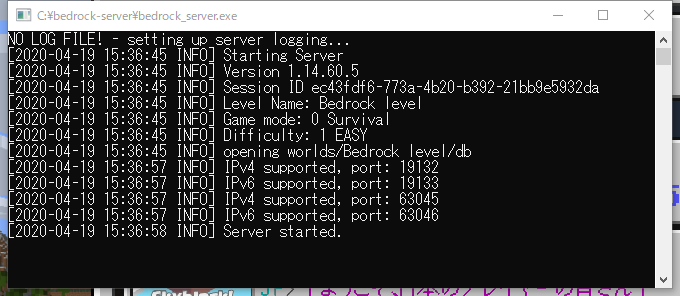
bedrock_server.exe サーバーをインストールしたパソコンから接続するには、外部サーバーのサーバーアドレスとして、「127.0.0.1」を入れれば接続可能。

外部サーバーを追加 その他のLANに接続されたパソコンからログインするには、サーバーとなるパソコンのコマンドラインから、ipconfigと入力してアドレスを確認し、サーバーアドレスに入れる。
しかし、これ、Microsoftにログインしないと遊べないのね。窮屈な世の中だ。
-
AmazonアソシエイトのAPIがバージョンアップするんだって
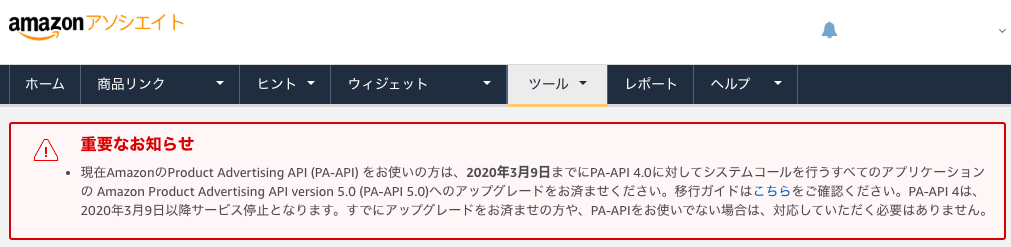
重要なお知らせ Amazonからメールがガンガン来る。英語と日本語で毎週。
アフィリエイトで利用しているAPIのバージョンが上がり、現在のものは利用できなくなるらしい。
詳しくは、次のページを参照してほしい。PA-API v5移行ガイド – Amazonアソシエイト
https://affiliate.amazon.co.jp/help/node/topic/GZH32YX29UH5GACMでは、対応作業を開始しよう。
ステップ1: 新しい認証情報を取得する
次のページを参考にまずはアカウントの移行が必要とのこと。
まず、次のページからログインし、「ツール」の「Product Advertising API」を選択する。
amazonアソシエイト
https://affiliate.amazon.co.jp/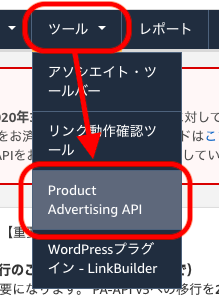
Product Advertising API ページ中程の「認証キーの管理」で、「新しい認証キーを取得する」を選択する。
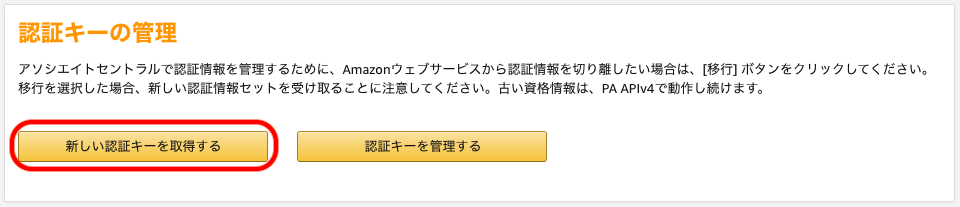
認証キーの管理 「移行の確認」画面が出てくるので、「続ける」を選択。
v5に移行してもv4が使えるよと、教えてくれている。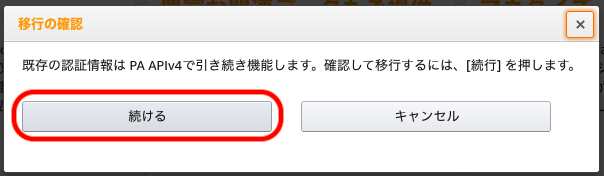
移行の確認 「認証情報のダウンロード」画面に、新規に生成された「アクセスキー」と「シークレットキー」が表示される。
「認証情報をダウンロードする」を選択すると、CSVファイルがダウンロードできる。
「シークレットキー」は、ダウンロードしたファイルとこの画面でしか参照できないので、ダウンロードしておく。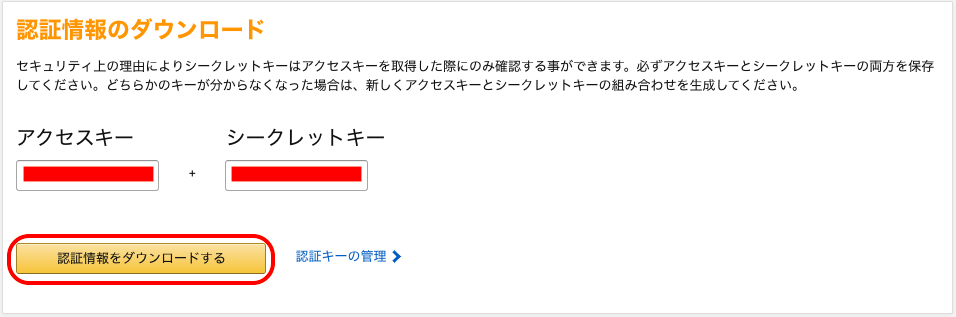
認証情報のダウンロード 「認証キーの管理」を選択すると、取得したアクセスキーIDが参照できる。
アクセスキーは90日ごとに変更するほうが良いみたい。
認証キーの管理 これで新しい認証方法の取得は完了。
さて、プログラムの更新するか。